
One of the easiest ways that I like to save a little extra spending money is to keep all the change I get back after I break a dollar. After awhile, I will roll what I have and take it to the bank.
Once I have the cash in hand, I turn around and spend it on a Disney Gift Card (or another Vacation Gift Card). I don’t count change as a part of my budget, so I never miss it.
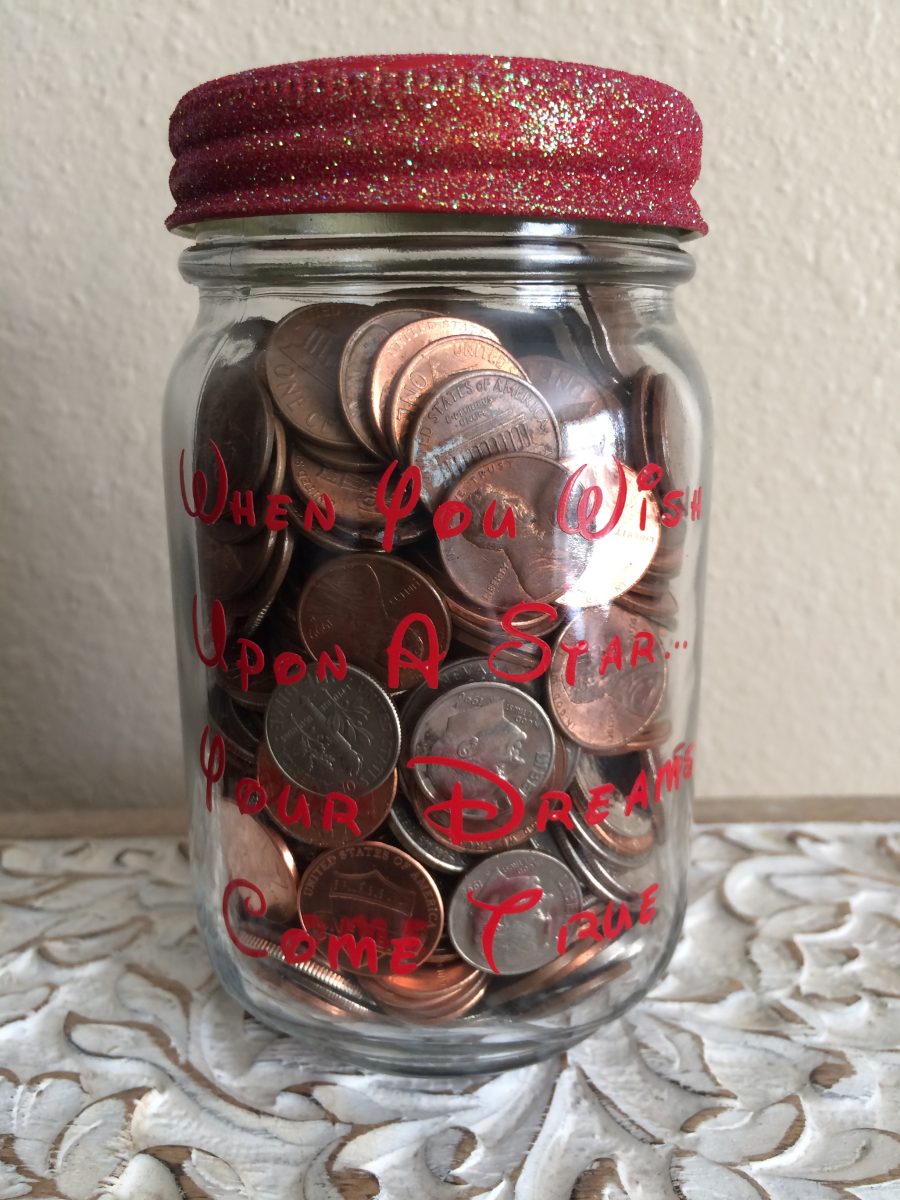
I used to just put my change in a regular old change jar. And that was fine. But, I wanted something PRETTY. So, I made it my mission one day to make a pretty Disney Change Jar. And really, I will use any excuse to use my Cricut 🙂
DIY Mason Jar Bank


Most of the items were in my house already, so it didn’t cost much to put it all together. The only thing I had to buy was the slotted coin slot for my Mason Jar, which I found online.
Supplies:
- Mason Jar
- Coin Slot Lid
- Vinyl
- Paint
- Mod Podge (optional)
- Glitter (optional)
- Glue for Glitter
Directions: The Jar
What I love about the Cricut Explore Air is that unlike the old Cricut Systems, you’re able to download images from the internet and upload them onto Cricut Design Space. I found the cutest Disney Castle Skeleton Key by doing a simple Google Search (A big thank you to whoever created it!) I arranged the Key to the size I needed and cut it out.
The jar didn’t feel complete with just a key on the front, so I started racking my brain to find the perfect saying to complete the the look I was going for. After a little thinking, I came up with the perfect phrase. As the wise Jimminy Cricket once said, “When you wish upon a star…your dreams come true.”
Want to make your own? Here’s the design in the Cricut Design Space – Skeleton Key and Font ( you will have to adjust the sizes for the size of your jar)
For the font, of course I had to go with my favorite! I had downloaded a font called Waltograph from DaFont a long time ago. (They’re awesome and they’re free!) As you can imagine, it’s the epitome of Disney! I tend to use this font whenever I’m making a Disney Craft, so this project was no different. I cut out the phrase and transferred it to my jar using some transfer tape I had lying around.
The Lid
I love the coin slot top that I got, but when I received it, I realized it was silver and my mason jar lid was gold. Not a good look. So I just simply painted the top and then sealed it with some Mod Podge to avoid chipping.
Looking back, I probably could have gone without the Mod Podge, but I was still trying to decide if I wanted to decorate the lid any more than just a little paint, so I went ahead and just sealed it.
While that was drying, I looked though my art supplies and I found my Martha Stewart Crafts Glitter Glue. Usually I don’t like using glitter because it gets everywhere! But, this stuff seriously sticks!! Seriously, if you’re working with glitter, use this stuff!
I sprinkled my uber pretty Martha Stewart Glitter in the color, Candy Apple.


No Comments